Servicing : Gold CoastBrisbaneSunshine CoastToowoomba

How to Prepare Concrete for Epoxy Properly
A failed epoxy floor rarely starts with the coating. It starts underneath it.
If you want to know how to prepare concrete for epoxy, the real answer is this: the coating is only as good as the slab it is bonded to. Shortcuts during preparation lead to peeling, bubbling, tyre lift, patchy gloss and premature wear. In garages, workshops and commercial spaces across Queensland, moisture, humidity and weak surface layers are often the reason a floor underperforms.
Professional results come from disciplined preparation. That means assessing the slab properly, removing anything that can interfere with adhesion, repairing defects and creating the right surface profile before a drop of epoxy is applied.
Why concrete preparation matters so much
Epoxy does not hide concrete problems. It magnifies them.
A slab might look sound at a glance, but still have oil contamination, residual curing compounds, laitance, moisture vapour issues or weak patch repairs sitting just below the surface. If those problems are left in place, the coating can bond to the contamination instead of the concrete itself. That bond is only temporary.
This is why surface preparation is not the slow, frustrating part of the job. It is the job. The finish, durability and long-term performance all depend on it.
For homeowners, that means a garage floor that resists hot tyre pickup and stays easier to clean. For facility managers and warehouse operators, it means better wear resistance, safer slip-rated finishes and less downtime caused by coating failure.
How to prepare concrete for epoxy step by step
There is no single method that suits every slab. New concrete, old garage slabs, warehouse floors and coastal properties all present different conditions. Still, the preparation process usually follows the same core sequence.
Start with a proper slab assessment
Before any grinding or coating begins, the slab needs to be checked for age, condition and contamination.
Fresh concrete must be fully cured before epoxy can be considered. In many cases, that means waiting at least 28 days, but cure time alone is not a guarantee that the slab is ready. Moisture levels still need to be checked, especially in humid conditions or in areas with poor vapour barriers.
At this stage, look for existing coatings, sealers, tyre marks, grease, paint, dusting surfaces, cracks, spalling and uneven repairs. A floor with old sealers or hidden contamination may need heavier mechanical preparation than a clean, sound slab.
Test for moisture, not just surface dryness
One of the most common mistakes is assuming concrete is dry because it looks dry.
Concrete holds moisture deep within the slab, and that moisture can push upward after the coating is installed. The result is blistering, whitening, delamination or complete coating failure. This matters even more in parts of South East Queensland where humidity is high and slab moisture can remain elevated for longer.
A proper moisture test gives you a clearer picture of whether epoxy can be applied as planned or whether a moisture mitigation system is needed first. This is not an optional extra on high-risk slabs. It is a key part of protecting the finished floor.
Remove grease, oils and contaminants completely
Epoxy needs direct contact with clean, sound concrete. Oil and grease stop that from happening.
In garages, this is especially important around parking areas, workbenches and the front edge of the slab where vehicles track in road grime. In commercial settings, contamination can come from machinery, forklifts, food production, cleaning agents or chemical exposure.
Degreasing must be done thoroughly, and heavily contaminated sections may need repeated treatment. If oil has soaked deeply into the slab, cleaning alone may not be enough. Some areas may need to be mechanically removed or repaired before coating.
Use mechanical grinding, not acid etching
If you are serious about long-term adhesion, mechanical grinding is the standard.
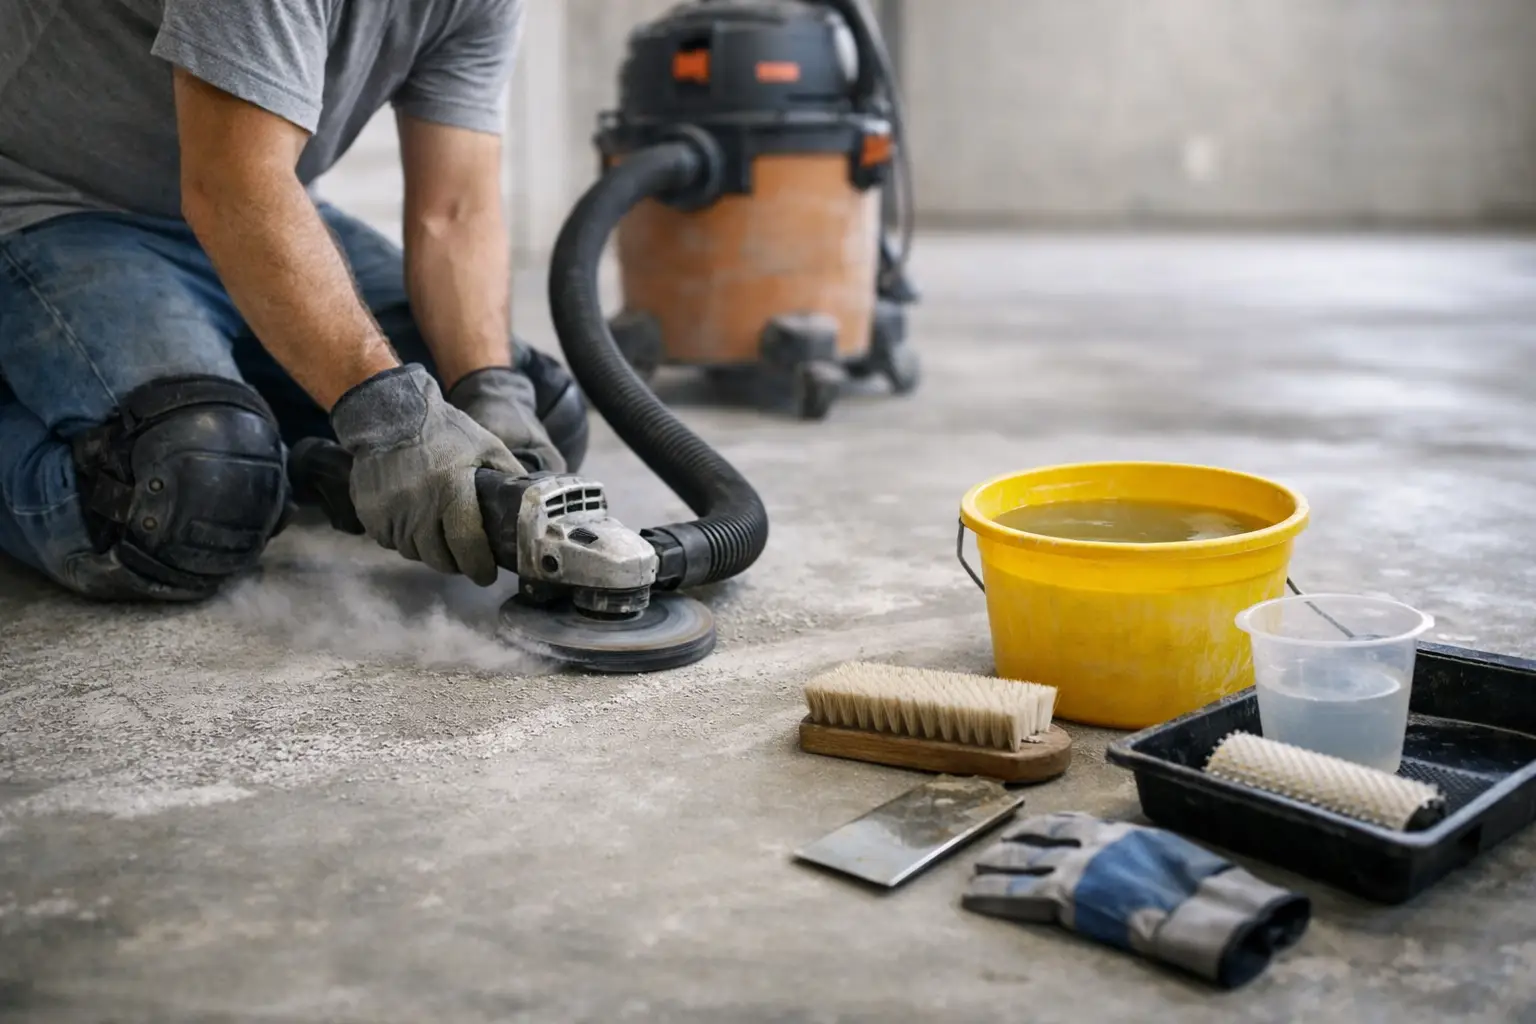
Grinding removes weak surface material, opens the concrete properly and creates the surface profile epoxy needs to bond. It also helps remove old coatings, minor surface contamination and laitance. Compared with acid etching, it is more consistent, more controllable and far better suited to professional epoxy systems.
Acid etching is often presented as a simpler alternative, but it comes with trade-offs. It can be inconsistent, it does not reliably remove contaminants, and if residues are not neutralised properly, it can create more problems than it solves. On premium flooring projects, grinding is the safer and more reliable method.
Repair cracks, holes and surface damage
Once the slab has been ground, defects are easier to see clearly.
Cracks, pitting, spalls and failed joints should be repaired before epoxy is applied. The right repair method depends on whether the defect is cosmetic, structural or movement-related. A small pinhole repair is very different from a moving crack or a broken expansion joint.
This is where experience matters. Filling every crack the same way can lead to reflective cracking through the coating later. Some joints need to remain functional, while others can be repaired and coated over depending on the system and the expected traffic.
The goal is not to make the slab look perfect at this point. The goal is to make it sound, stable and suitable for the specified coating system.
Vacuum the surface thoroughly
Dust is the enemy of adhesion.
After grinding and repairs, the slab must be vacuumed properly using equipment suited to fine concrete dust. Any remaining powder, loose repair residue or debris can weaken the bond between primer and slab.
This step sounds simple, but it is one of the easiest places for standards to slip. A floor can look clean while still carrying a fine layer of dust that compromises the coating.
Prime according to slab condition
Not every concrete slab absorbs coating the same way, which is why primer selection matters.
Some slabs are dense and tight. Others are porous and thirsty. Some have had repairs across multiple areas, creating mixed porosity across the floor. A suitable primer helps stabilise that variation, improves adhesion and reduces the risk of pinholes or inconsistent finish.
If moisture is a concern, the primer stage may also involve a specialist moisture-tolerant or moisture-mitigating product. This depends on test results, slab condition and the coating system being installed.
Common mistakes that cause epoxy floors to fail
Most epoxy failures can be traced back to preparation, not the product itself.
The first problem is underestimating contamination. A slab that has seen years of vehicle traffic, spills or cleaning chemicals needs more than a quick wash. The second is skipping moisture testing, especially on ground-level slabs in humid or coastal areas. The third is using the wrong prep method, such as light sanding where grinding is required.
Another common issue is coating over weak concrete. If the top layer of the slab is dusty or brittle, epoxy can pull that layer away from the stronger concrete beneath it. The coating then fails even though it bonded exactly as it was supposed to.
Temperature and humidity also matter. Even with a well-prepared slab, poor installation conditions can affect curing, gloss consistency and final performance. That is why professional epoxy installation is as much about timing and site control as it is about materials.
What preparation looks like in different spaces
A domestic garage usually needs attention around oil spots, tyre wear, hairline cracking and edge deterioration. The finish often needs to balance durability with appearance, especially when the garage is part workshop, part storage and part entry point to the home.
In warehouses and commercial spaces, the demands are different. The slab may need heavier grinding, larger-scale repairs and a more specific surface profile based on forklift traffic, pallet movement or compliance requirements. Slip resistance can also influence the final system build, particularly where AS 4586 considerations apply.
Decorative spaces such as showrooms or metallic epoxy areas require even tighter preparation standards because the finish will highlight every imperfection underneath. If the substrate is inconsistent, the final look will be too.
When professional preparation is the better option
There is a difference between getting epoxy onto a floor and installing a floor that lasts.
For small DIY jobs, people often focus on the coating kit. Professionals focus on the slab. That is the difference between a floor that looks good for a season and one that performs for years.
On premium residential and commercial projects, proper concrete preparation involves industrial grinding equipment, dust-controlled systems, moisture assessment, crack repair expertise and a clear understanding of how local conditions affect curing and adhesion. In Queensland, where heat and humidity can shift the risk profile quickly, that level of control matters.
Resin Masters approaches preparation as the foundation of the whole system, because that is what it is. A premium epoxy finish is not built in the topcoat. It is built in the work done before the coating starts.
If you are planning an epoxy floor, treat the slab with the same seriousness as the finish. Good preparation is what gives you the clean look, the hard-wearing surface and the confidence that the floor will still be performing well long after the first coat has cured.
3 Responses